


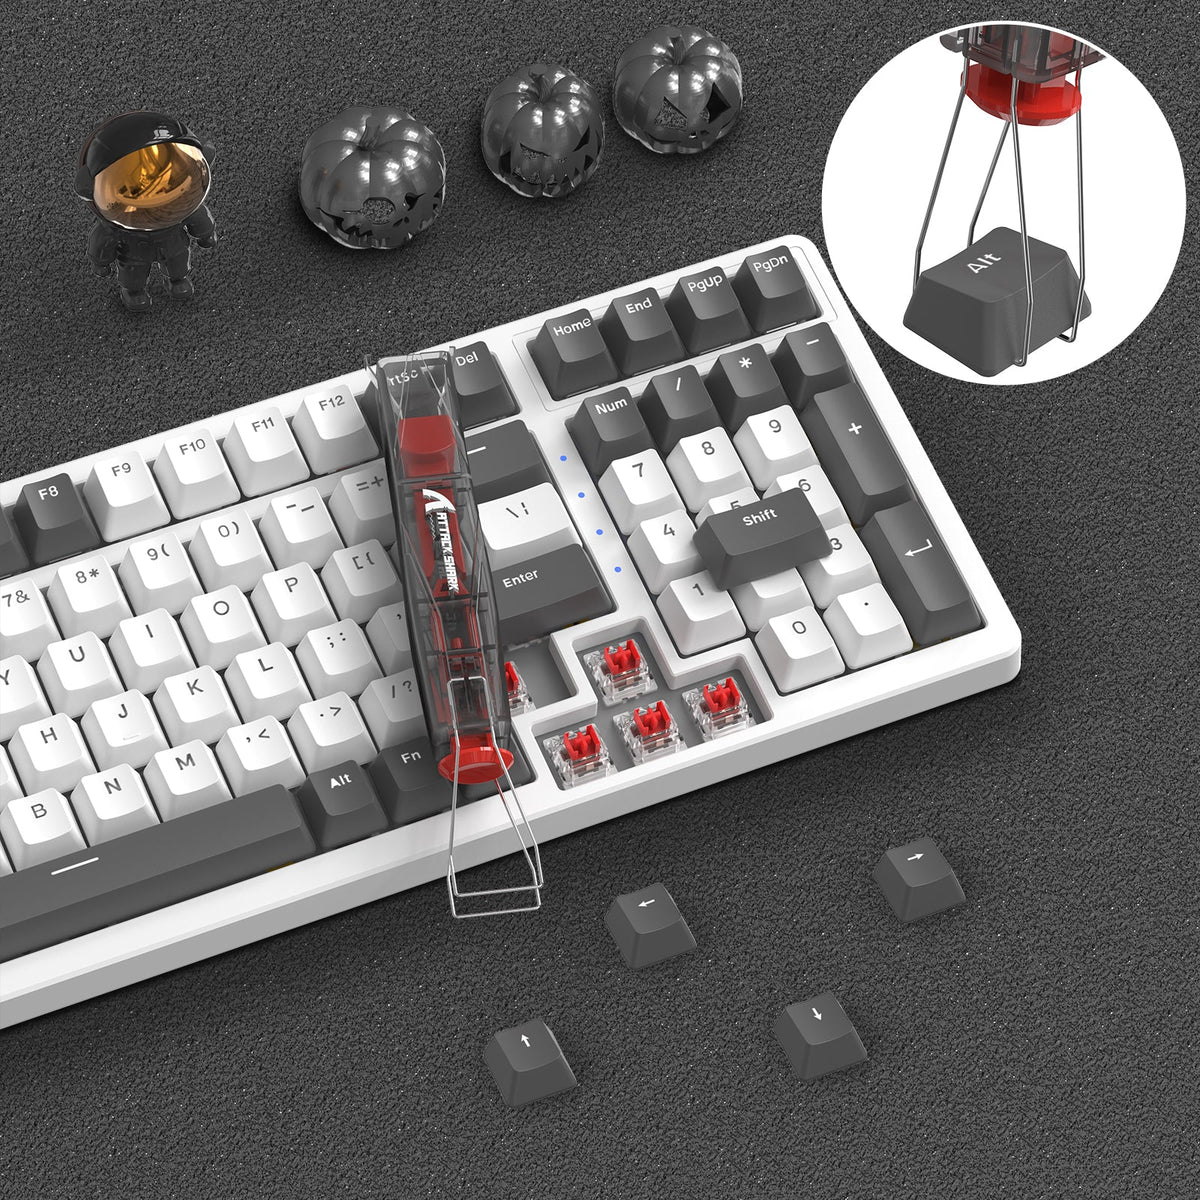
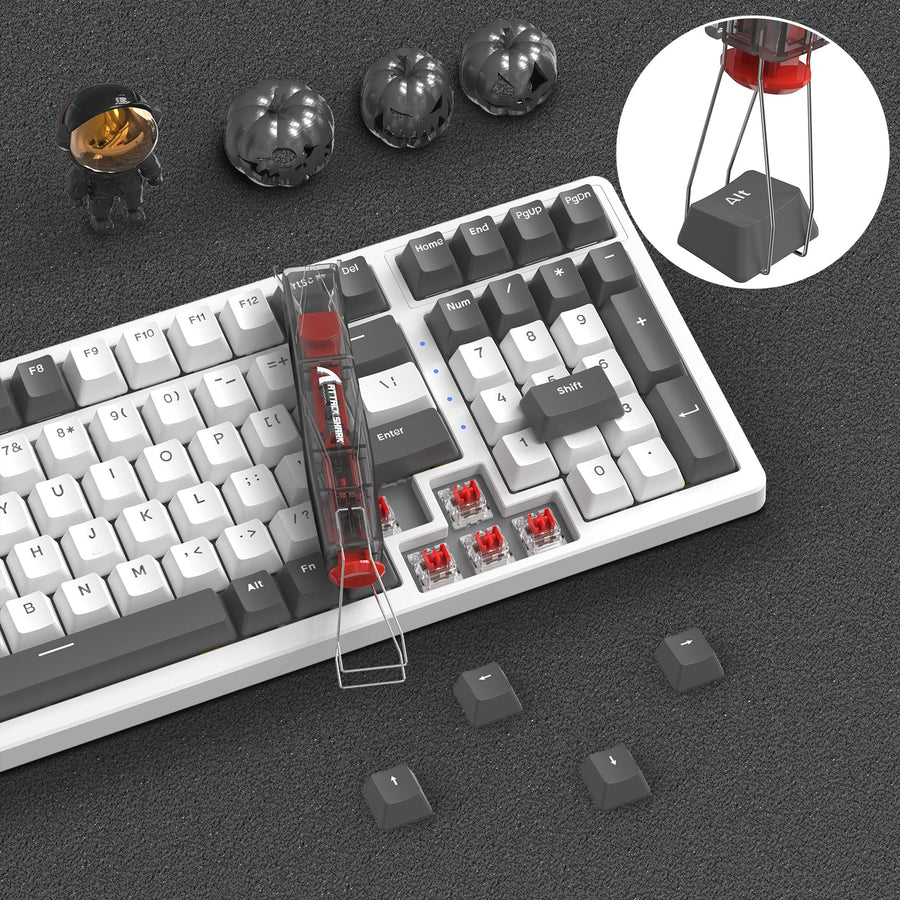
Remove a keycap safely by fitting a keycap puller onto its two opposite sides near the base and lifting straight up with steady, even force. This keeps the pulling force on the keycap itself instead of the switch stem underneath, protecting both the cap's finish and the switch. Even on the cheapest keyboard, larger keys like the spacebar need a different, two-sided lift because they rest on stabilizer bars instead of a single stem.
Step-by-Step Keycap Removal Process
The safest motion keeps the puller's grip on the keycap, never on the exposed switch stem. Follow this order for standard, single-stem keycaps.
- Power down and unplug the keyboard if the model allows it, and take a photo of the layout before pulling more than a couple of keys.
- Position the keycap puller directly above the cap you want to remove, centering it over the key.
- Clip the puller onto opposite sides and lift upward with one straight, steady motion rather than rocking or twisting the tool.
- Set the removed keycap aside and check the exposed switch stem and the keycap's underside for scuffing before moving to the next key.
This sequence covers ordinary keycaps with a single center stem. Larger keys with stabilizer hardware, like the spacebar, need the different approach described later in this guide.
Choose the Right Keycap Puller and Prepare the Keyboard
A safe puller grips the keycap's sides, not the switch stem underneath, and fits your hand well enough to pull straight up without wobbling. Prepare the keyboard first so you don't lose track of where each key belongs.
What the Puller Should Grip
The puller's contact points belong on the keycap's opposing vertical sides, near its lower edge, where the plastic is thick enough to hold a firm grip. Reject any tool position that presses against or hooks the switch stem itself, since that transfers force to a part the keycap is meant to protect. Fit and control matter more than the exact puller shape; a wire-style tool and a ring-style tool can both work if they seat cleanly on the cap.

If you want a dedicated option, our KS01 keycap puller pairs two adjustable stainless-steel wires for keycap removal with a separate manganese-steel switch puller. It's built around detachable keycaps and 3-pin or 5-pin hot-swappable switches, and it isn't intended for switches that are soldered onto the board.
Prepare the Keyboard and Record the Layout
Remember to power down and unplug the keyboard when applicable before you start pulling keys, since this prevents stray inputs while your hands are near the switches. Take a photo of the full layout before removing more than a few caps, especially if the board has non-standard or shifted special keys. Keep this preparation step separate from cleaning or switch work; it only sets up a safe removal session.
Protect Switch Stems and Keycap Walls During the Pull
The puller should hold the keycap's sides while the switch stem and the keycap's outer walls stay completely clear of the tool. If the puller scrapes the side walls or hooks the stem, reposition it before pulling instead of continuing.
Before you lift, glance at the tool: both contact points should sit low on the keycap, centered, with no part of the hooks touching the stem. A tool that looks angled, off-center, or is gripping unevenly is a sign to stop and reseat it, not a reason to pull harder. Angled or twisting force is the main way a puller ends up scraping the keycap's finish or stressing the stem instead of releasing the cap cleanly.
Remove Spacebars and Other Stabilized Keycaps
Spacebars and other large keys sit on stabilizer hardware, not a single stem, so they need even pressure on both sides rather than a centered single-point pull. Treat this as a separate step from the ordinary keycap procedure above.
Spacebar, Shift, and Enter
These larger keys are common examples of keys built with stabilizer hardware underneath. Engage the puller evenly on both sides before lifting, rather than prying one end up first. Not every keyboard uses the same stabilizer design, so check how the key sits before assuming it matches another board you've worked on.
Keep Stabilizer Clips Aligned
Lift gently once both sides are engaged, instead of prying one side sharply higher than the other. This keeps the stabilizer clips seated correctly, since forcing one end up can bend or snap them. If the key doesn't rise evenly on both sides, release the pressure and check the puller's position before trying again.
What to Do When a Keycap Resists Removal
The correct response to a resistant keycap is to stop and inspect, not to pull harder or at an angle. Release the puller as soon as something feels wrong, then work through the checks below before retrying.
If the Keycap Resists or Tilts
Don't twist, lever, or increase force when a cap won't release. Check whether the puller is actually seated on the keycap's opposite sides rather than slipping toward the stem. Also look for stabilizer hardware or an unusual keycap shape, since either can change how much resistance is normal.

If a Switch or Other Component Appears to Rise
Release the pull immediately if the switch or another part seems to lift along with the cap, and inspect the connection before doing anything else. Applying steady, even upward pressure rather than an angled pull is the safer default, but not every hot-swappable board behaves identically under force. If the construction or fit stays unclear, check your keyboard's own documentation or support resources instead of continuing to pull.
FAQs
Are wire and ring keycap pullers equally safe?
Neither design is established as universally safer for every keyboard. Choose whichever one grips the keycap's opposing sides without touching the switch stem and lets you pull straight up. Check the fit visually before you apply any force, and switch tools if one keeps slipping or scraping the cap.
How often should I remove keycaps for cleaning?
There's no fixed schedule that fits every keyboard. Remove keycaps when you see visible dust or debris under the keys or when a specific task, like fixing a sticky key, requires it, rather than following a set calendar interval.
Does PBT or ABS change how I should remove a keycap?
The keycap material label alone doesn't call for a different removal method. Whether a cap is PBT or ABS, the same contact and force rules apply: grip the opposing sides, avoid the stem, and pull straight up. Don't use a material label as a reason to force a poor-fitting puller.