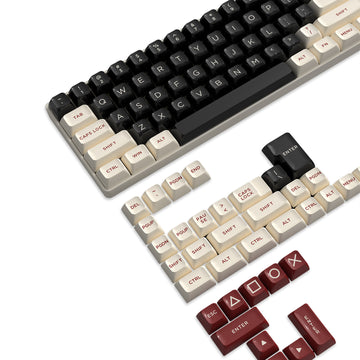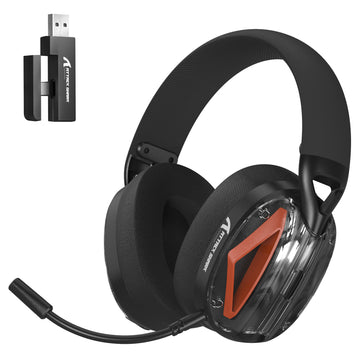



The safest way to deep clean a hot-swappable mechanical keyboard without breaking switches is to disconnect it completely, photograph the layout, then remove keycaps and switches with the correct pullers before cleaning each part with a method suited to its material. Detachable keycaps can sometimes go in an ultrasonic cleaner, but switches, the circuit board, and other electronics need to stay dry the whole time. Once every part is completely dry, reassemble the board, check each key, and only then reconnect it.

The Safe Deep-Clean Sequence
Proceed with a full teardown only if you can safely disconnect the keyboard and, for wireless or battery models, isolate power according to that model's instructions. If the internal construction or battery isolation method isn't clear, stick to wiping the surface and case exterior instead of guessing your way through a teardown. Whether maintaining a custom build or the cheapest mechanical keyboard, following a disciplined order protects delicate sockets and contacts.
From there, the sequence runs in one direction: prepare and document, remove keycaps and switches without forcing them, clean each component with the method it can actually tolerate, dry everything completely, then reassemble and test. Detached keycaps are the only part that may go near water or an ultrasonic cleaner; switches, the PCB, and any battery stay dry throughout. For a lighter refresh between full teardowns, our routine cleaning guide covers surface dusting without opening the case.
Prepare the Keyboard Before Opening It
Before removing a single keycap, disconnect the keyboard from every device and gather tools that won't damage stems or pins. Even on the cheapest mechanical keyboard, using dedicated pullers instead of makeshift pry tools prevents snapped stems and bent pins. IFixit's teardown guidance recommends unplugging fully, photographing the layout, and waiting until keycaps are dry before you reconnect anything.
Gather these before opening the case:
- A keycap puller
- A switch puller, or a combined tool that does both
- Compressed air with a straw nozzle
- A soft brush or lint-free cloth
- Small containers or a divided tray for screws and switches
- Your phone camera, for layout photos
- A screwdriver matched to your case screws
- An ultrasonic cleaner, only if your keycap material is confirmed compatible
Then work through this checklist:
- Disconnect the keyboard from your computer and any other paired device
- If the board is battery-powered, isolate power exactly as your model's instructions describe; if that step isn't clear, stop here and clean the exterior only
- Photograph the full layout, paying extra attention to stabilizer keys
- Clear loose debris with compressed air before anything else
If you don't already own a puller set, the ATTACK SHARK KS01 puller combines a keycap puller and switch puller in one tool. It's built for detachable PBT and ABS keycaps and 3-pin or 5-pin hot-swappable switches like Cherry MX and Kailh, though it isn't designed for switches that require soldering.
Remove Keycaps, Switches, and Screws Without Damage
Each part comes off differently, and rushing any of them is what bends pins or twists stems. Work through keycaps, then switches, then screws, in that order.
Remove Keycaps Without Twisting Stems
Center the keycap puller directly over the cap and lift straight up instead of rocking it side to side. Stabilized keys like the spacebar and shift keys often need a lighter touch, so check your model's guidance if one won't budge easily. Drop each keycap into its labeled slot or the photographed layout so reassembly doesn't turn into guesswork.
Release Switches and Protect Hot-Swap Pins
- Confirm the switch is fully released before you pull on it.
- Keep the switch puller aligned squarely over the switch housing.
- Pull straight upward, without rocking the switch side to side.
- Inspect the two contact pins before reinsertion. If either pin looks bent or misaligned, stop and correct it instead of forcing the switch into the socket.
Label Screws Before Opening the Case
Match your screwdriver head size to each screw and press down firmly while turning, so the bit doesn't slip and strip the head. Keep a simple map of which screw came from which hole, since case screws are sometimes different lengths. If a screw starts spinning without loosening, stop and check the bit size instead of pushing harder.
Clean Each Component With the Right Method
Different parts of the board tolerate different cleaning methods, and mixing them up is the fastest way to damage something. Keep water and ultrasonic cleaning away from anything that still has switches, a circuit board, or a battery attached.
Wash Only Detached, Verified-Compatible Keycaps
Only consider water or an ultrasonic cleaner once keycaps are completely removed from the board. Treat ultrasonic washing as conditional: confirm your keycap material and finish can tolerate it, since dye-sublimated legends, certain coatings, and some plastics react differently and no single setting is documented as safe for all of them. Keep washed keycaps away from switches and electronics, and let them dry fully before reinstalling.
Clean Switches and Plate With Dry Methods
Clear loose dust and crumbs from the switches and plate before deciding on anything else. A controlled burst of compressed air paired with a soft brush handles most embedded debris; Apple's compressed-air technique for MacBook keyboards uses the straw, holds it about half an inch from the surface, keeps the can upright, and sweeps in one direction rather than blasting one spot, though that guidance covers MacBook keyboards, not hot-swappable mechanical boards. Keep any liquid away from switches, the PCB, and plate-mounted electronics unless your model's manual says otherwise.
Clean the Chassis Without Wetting Electronics
Separate the case halves only once you've confirmed how your specific model opens. Wipe exterior chassis surfaces with a lightly damp cloth suited to the case material, and never submerge or spray a case piece while the PCB, battery, or connectors are still attached. Let every wiped surface dry completely before putting anything back together.
Dry, Reassemble, and Test Before Use
Don't reconnect the keyboard until every part is completely dry, including any alcohol used on the board, since guessing at a drying time risks a short or leftover residue. Full dryness is the gate, not a fixed number of hours.
Return switches to their sockets using the pin alignment you checked during removal, and press each one home only after confirming it sits flush. Replace screws using your earlier map, snug but not overtightened, then reinstall keycaps in their photographed positions.
Once the case is closed, reconnect the keyboard and test every key, along with any connection mode you use day to day. Our keyboard test tool can help you check for dead keys, ghosting, or missed inputs during that pass. Verifying every switch ensures that even the cheapest mechanical keyboard functions reliably after a thorough clean. If a key feels wrong, doesn't register, or the connection is unstable, power down and reopen that area to check switch seating and pin alignment rather than repeating the test with more force.
FAQs
Can detached keycaps be ultrasonically washed if their material or finish is unknown?
Hold off on the ultrasonic cleaner until you know what your keycaps are made of. Dye-sublimated legends, certain coatings, and some plastics don't have documented ultrasonic compatibility, and immersing them without that confirmation risks fading, warping, or lifting a printed legend. Until you can confirm the material and finish with the manufacturer or a matching product listing, clean detached keycaps by hand with a soft brush and a barely damp cloth, then let them air-dry completely before reinstalling.
Can mechanical keyboard switches or circuit boards be washed with water?
No. Keep switches, printed circuit boards (PCBs), and internal electronics completely dry. Water or ultrasonic immersion can corrode electrical contacts, wash away factory lubrication, or cause short circuits when powered. Clear debris from switch housings and the PCB plate using dry compressed air, a soft brush, or a dry microfiber cloth instead.
When should you stop a teardown on a wireless or battery-powered keyboard?
Stop the teardown and stick to external surface cleaning whenever your wireless keyboard lacks clear manufacturer instructions for safely isolating or disconnecting the internal battery. Forcing open battery enclosures or handling unverified internal power assemblies risks puncturing the battery or tearing delicate ribbon cables.